Browse using the new Vinous website now. Launch →
Printed by, and for the sole use of . All rights reserved © 2015 Vinous Media
The Sweet Heat of Cajun Dry-Rubbed Ribs
BY ERIC GUIDO | JULY 17, 2020
I will never forget my first experience with a perfectly cooked, fall-off-the-bone, rack of ribs. Granted, at the time, it was slathered with a heavy sweet-and-spicy barbeque sauce, but even with the intensity of that sauce, the flavor and texture of those ribs shined through like a beacon in the night. In my opinion, no other dish is quite as decadent and satisfies all of the senses, while also being nourishing to the body, mind and soul.
That experience put me on a path to trying to understand ribs better, which started with the pleasurable task of tasting them as often as possible. This led to discovering what became my true favorite rib preparation: dry-rubbed ribs. Ever since then, I pass on the sauces and the smoke-infused versions, while also preferring to go with spareribs over baby back because what I learned was that a perfectly cooked rack of dry-rubbed spareribs can showcase all of the cuts’ natural meaty flavors, textures and sense of umami. To put this into a wine lover's perspective, imagine the greatest glass of pure varietal wine versus one that’s been heavily oaked. That’s the difference. If you think it sounds odd to hear someone speak so lovingly about a plate of food, then you may have never had perfectly cooked ribs. Today's recipe might provide you with the ideal way to change that.
The best part of enjoying ribs is that it’s also remarkably easy to make them yourself. The biggest obstacle is time because we are going to be cooking these low and slow, which is the only way to achieve that fall-off-the-bone goodness. Also, with my preparation, you can plan around the actual work in the kitchen and utilize the time in between the few occasions that you need to attend to the ribs to get other things done. As an example, even though the entire process takes about five hours, your involvement will only take a ½ hour.
What’s more, one of the best things about this recipe is that you can easily transform it from dry-rubbed ribs into a barbecue-slathered rack if you prefer that that style, essentially making this preparation the only one you need to please everyone at the table. When it comes to picking the right ribs to use, look for St. Louis-style spareribs, which have the cartilage, sternum, and rib tips already removed - making your job even easier.
As for the dry rub itself, this recipe will make about five ounces, which is more than you need for the ribs; but in my opinion, whenever making a mixture like this, it’s always a good idea to make extra to use on other preparations. My Cajun Dry Rub can be used on steaks, burgers, chicken - basically anything that you want to add some sweet heat to. So, experiment to your heart’s content, and get ready to have a serious dry-rubbed rib experience.
The video tutorial is packed full of hints and tips to cook the perfect Cajun Dry-Rubbed Ribs.
Cajun Dry-Rubbed Ribs Ingredients:
Cajun Dry Rub (This recipe will make enough Cajun Dry Rub to use in multiple preparations. Have a container ready to store the unused rub.):
¼ cup sweet paprika
3 tablespoons kosher salt
1 tablespoon onion powder
1 tablespoon garlic granules
1 tablespoon oregano
1 tablespoon rosemary
2 teaspoons black pepper
1-2 teaspoons cayenne pepper (depending on your taste for heat)
3 crushed bay leaves
Ribs (Serves 2-3):
2 ½-to 3-pound St. Louis-style Spareribs (halved with excess fat trimmed)
Enough Cajun Dry Rub to coat
6 stalks of celery peeled and cut into 3-4 inch pieces
6-8 carrots, partially peeled and cut into 3-4 inch pieces
1 onion, quartered
5 sprigs of fresh rosemary
1 quart of stock (chicken or mushroom)
1 tablespoon apple cider vinegar
Olive oil, grapeseed oil or avocado oil as needed
Salt and pepper for seasoning
Optional additions:
1. You can also add some waxy or boiling potatoes to your vegetable mix to add even more diversity on your dinner plates.
2. I like to serve this dish with coleslaw on the side. It’s a traditional pairing and a great palate-cleanser.
Wine Pairings:
Cajun Dry-Rubbed Ribs:
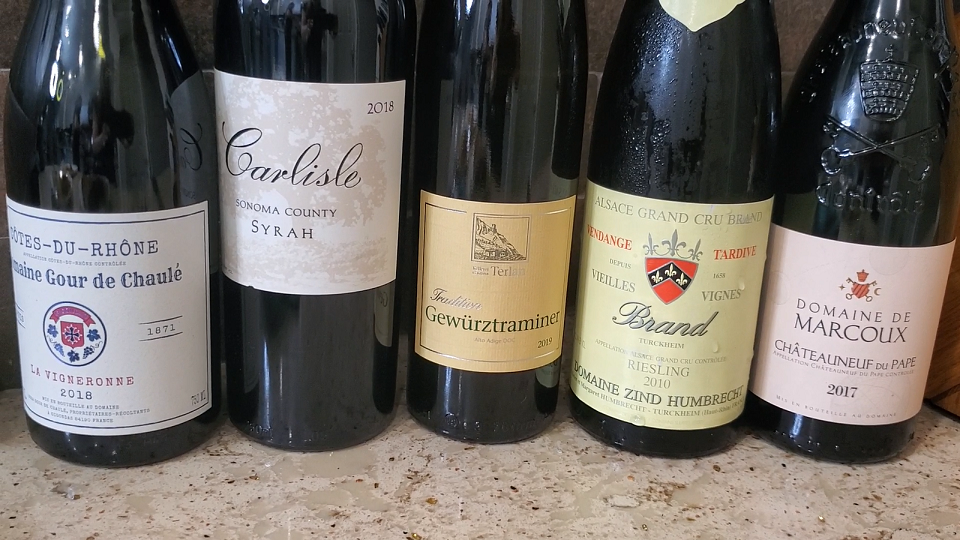
Grenache blends - Côtes du Rhone - Featured wine: 2018 Domaine du Gour de Chaulé Côtes du Rhône. Find it on Delectable.
Gewürztraminer - Featured wine: 2019 Terlan Alto Adige Gewürztraminer Tradition. Find it on Delectable.
Alsatian Riesling - Featured wine: 2010 Zind-Humbrecht Riesling Brand Vieilles Vignes. Find it on Delectable.
BBQ-Style Dry-Rubbed Ribs:
Domestic Syrah - Featured Wine: 2018 Carlisle Syrah (Sonoma County). Find it on Delectable.
Grenache - Châteauneuf du Pape - Featured Wine: 2017 Domaine de Marcoux Châteauneuf-du-Pape. Find it on Delectable.
Share your own wine pairings on Delectable and check out what others have paired with ribs.
The Process:
The night before you plan to make your ribs:
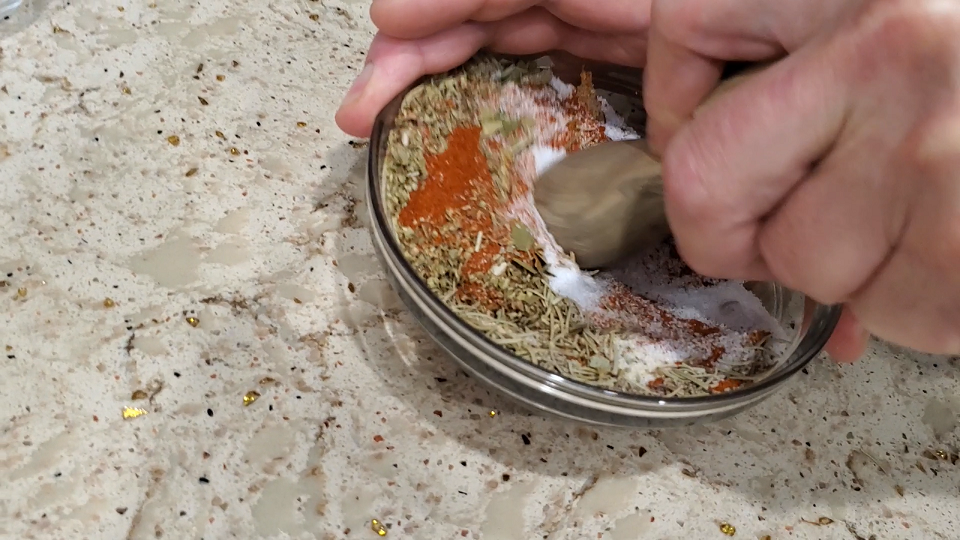
1. Mix up your dry rub by adding sweet paprika, kosher salt, onion powder, garlic granules, oregano, rosemary, black pepper, cayenne pepper and crushed bay leaves to a bowl.
2. Using either a mortar and pestle or the end of a lemon reamer, work the mixture by pushing down and twisting. You’re not looking to crush all of the ingredients into a powder, but instead to begin breaking up some of the dried herbs to release more flavor. Mix and then pour into a container that can be used to store this mixture.
Use either a mortar and pestle or the end of a lemon reamer to work the dry rub mixture by pushing down and twisting.
3. Lay your ribs out on a clean work surface and, using a paring knife, cut off any excess fat. You don’t want to remove all of the fat, just any large chunks that may not melt away during the cooking process.
4. Have a large Ziplock bag or plastic wrap handy to store your ribs in the refrigerator overnight.
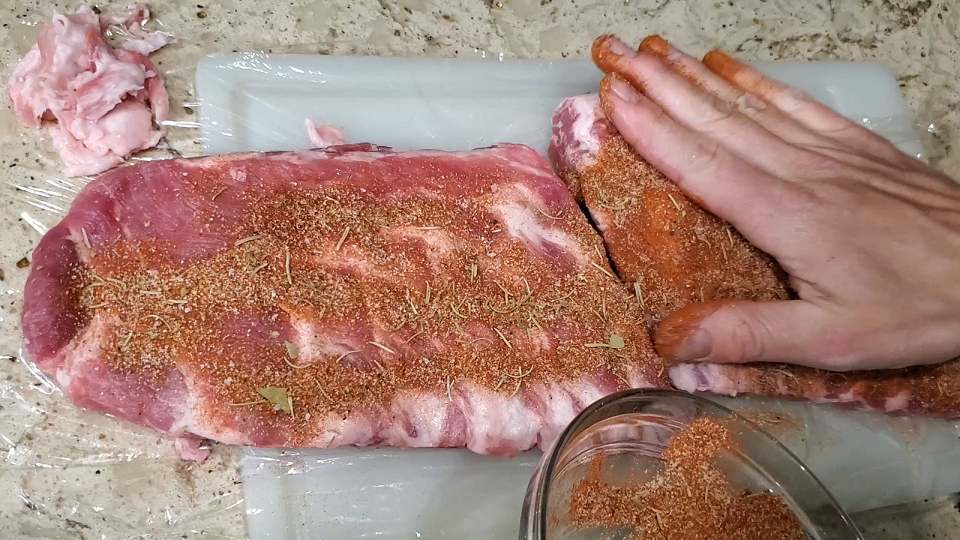
5. Sprinkle the dry rub all over the ribs - top, bottom and sides - creating an even coating throughout.
Sprinkle the dry rub all over the ribs.
6. Place the ribs into your bag or wrap in plastic wrap, and return it to the refrigerator to rest overnight.
The day you plan to make your ribs:
1. Plan for 5 ½ hours of preparation before serving.
2. Take your ribs out of the refrigerator one hour prior to cooking to let them come to room temperature.
3. When ready, turn your oven’s broiler on high, and place the rack to its highest position.
4. Place a heavy gauge cooking vessel over a medium flame. Roasting pans are perfect to allow the ribs to have space in the pan. Also, if you have a rack insert, it can be useful here; otherwise, the ribs can cook resting over the vegetables.
5. Pour enough oil into the pan to lightly coat the surface, and add your carrots, celery and onions. Stir to coat them in the oil, and season them with salt.
6. Place your ribs (meaty side up) on a foil-lined sheet pan and put them under the broiler. Set your timer for two minutes.
7. If you plan to rest the ribs on the vegetables, then leave them in the pan and turn the heat to low. If you plan to use an insert, take the vegetables out, and place the insert into the pan, and then the vegetables on top of it.
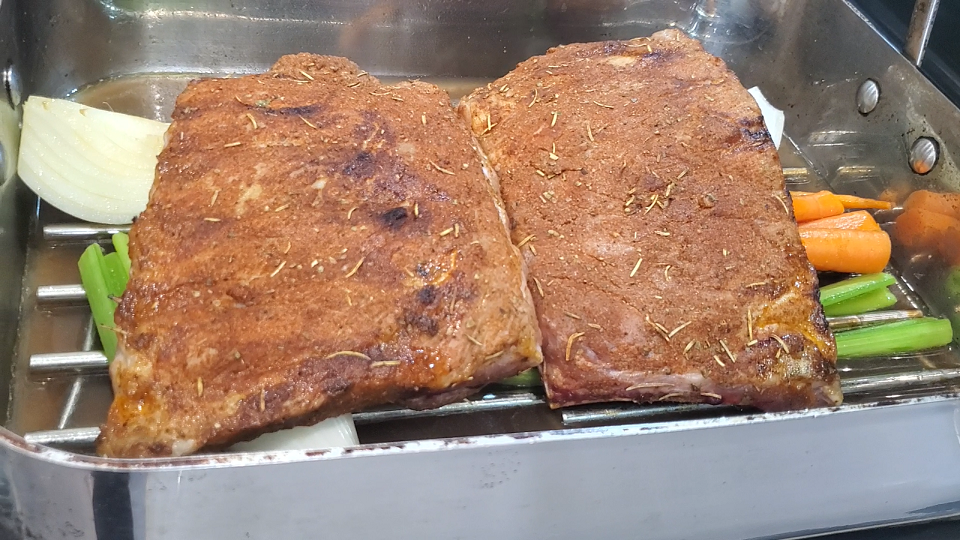
8. Once your timer goes off, take the ribs out of the oven and place them over the vegetables in the pan.
Place the ribs on top of the vegetables.
9. Turn off your broiler and set your oven temperature to 235 degrees.
10. Add enough stock to come up just below the ribs (you don’t want them sitting in the stock) and place your burner to medium-high.
11. Bring the stock to a light boil, and then remove from the heat.
12. Place a sprig of rosemary across each set of ribs and cover the pan. If the pan does not have its own cover, a tight-fitting layer of aluminum foil will be fine.
13. Place the pan in the center of your oven and set the timer for 3 ½ hours.
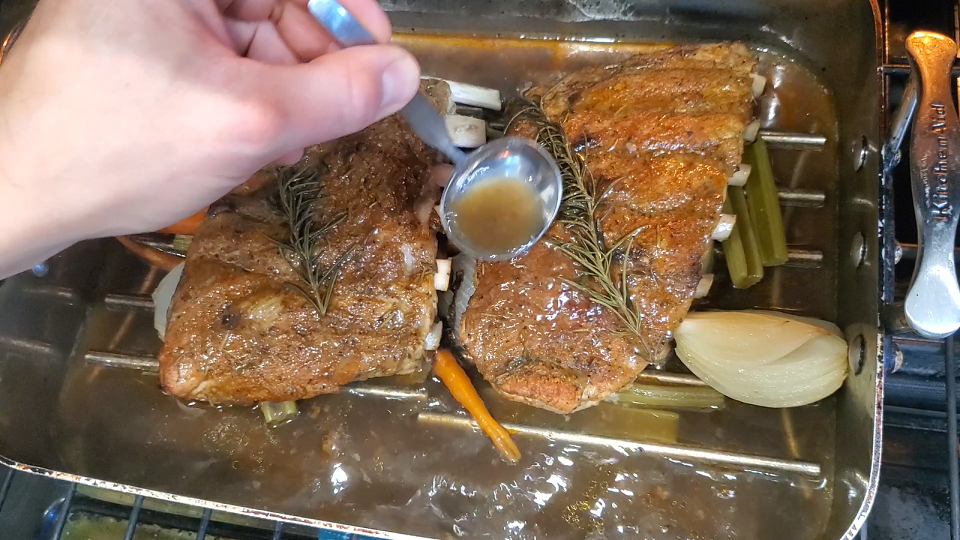
14. Once the timer goes off, remove the foil and baste the top of the ribs with the stock.
Baste the top of the ribs with the stock.
15. Now leave the ribs uncovered and allow them to cook for another ½ hour.
16. Once completed, take the pan out of the oven and move the ribs to a clean cutting board or aluminum foil-lined baking sheet. Cover them lightly with foil and allow them to rest for a ½ hour.
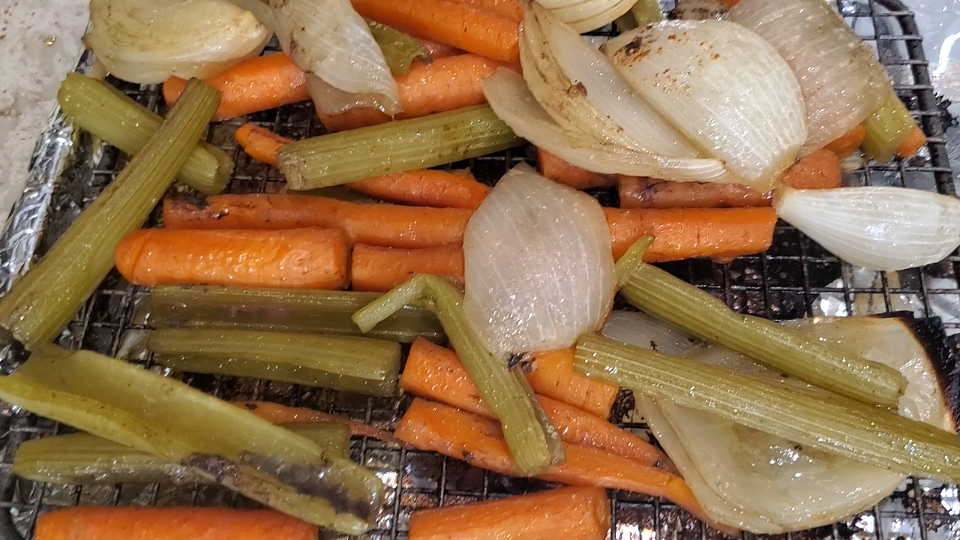
17. Move the vegetables to another baking sheet, season with salt and place them in the oven to allow their flavors to intensify.
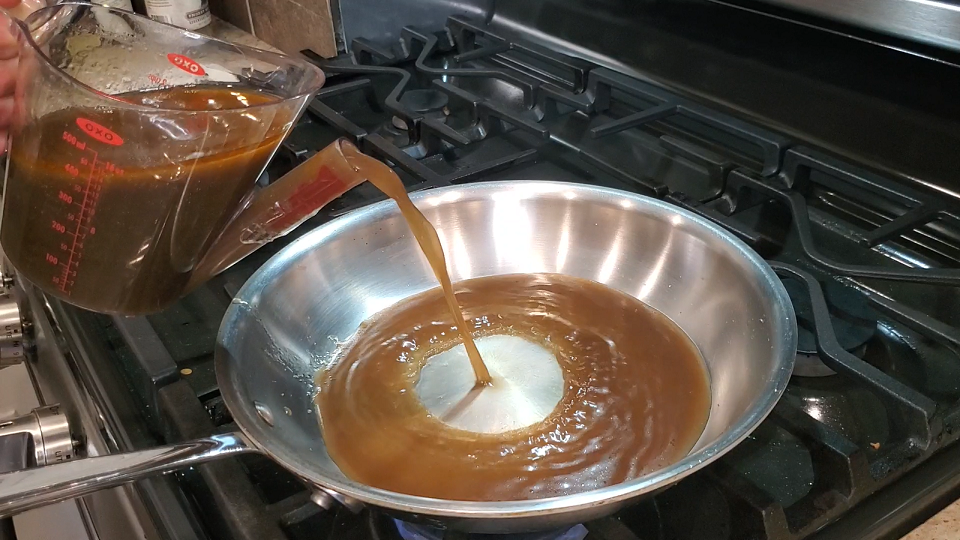
18. Pour the remaining stock through a fat separator, and let it cool for five minutes; then pour the liquid, but not the fat, into a sauté pan, and place over medium heat to reduce.
Reduce the remaining stock over medium heat.
19. If you want to make some of your ribs in a barbeque style, take a ¼ to ½ cup of your favorite barbeque sauce (I like Mesquite because it adds a smoky flavor, but Bourbon is also another popular flavor), and place it over a low flame for five to ten minutes to heat it completely through and cook off a bit of its liquid.
20. Once the ribs have rested for about 25 minutes, remove the foil and cut them into the portion sizes you plan to serve them in. If you are going to make any of the ribs barbeque style, brush them with the warmed barbeque sauce. (I like to put any leftover barbeque sauce in a ramekin that can be placed on the table.)
Brush the ribs with the warmed barbeque sauce.
21. Take your vegetables out of the oven and turn your broiler on high.
22. Place the ribs back in under the broiler for 1-2 minutes. Watch carefully to make sure that the barbeque sauce doesn’t begin to burn. As for the dry-rubbed ribs, this is simply to give them one last blast of heat before service.
Continuing to roast the vegetables after separating them from the ribs will intensify their flavor.
23. Pour the gravy from the sauté pan into a serving bowl or container to store it.
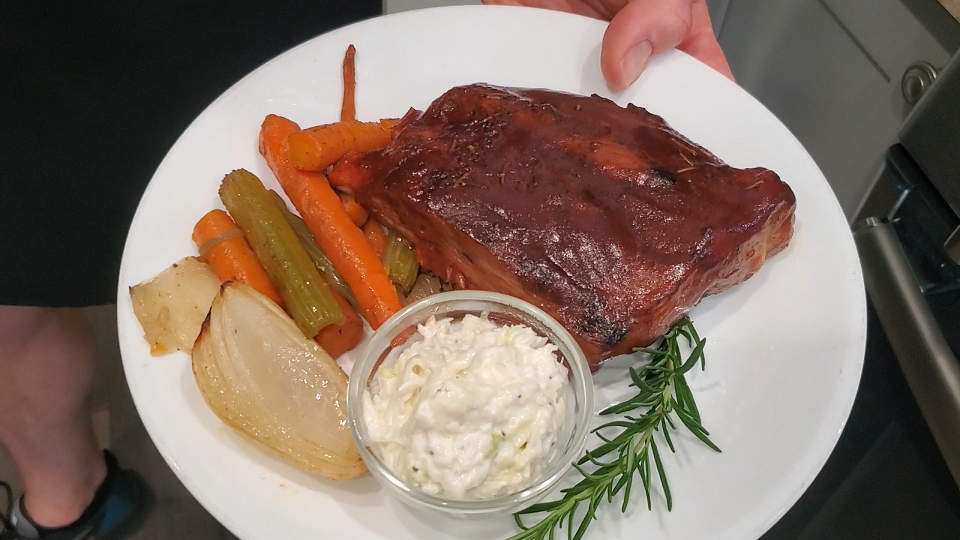
24. Dress your plates with the vegetables (a ramekin of your favorite coleslaw if you have some) and place the ribs on the plates with some fresh rosemary.
Dress your plates with the vegetables and sides, and you are ready to serve.
25. If you prefer your dry-rubbed ribs with gravy, drizzle some over the top of them, and place the rest on the table for your guests to serve themselves.

